Wiring Guide
Wiring Guide
Proper wiring is crucial for your Arduino car's functionality and safety. Follow this step-by-step guide to connect all components correctly, ensuring optimal performance and reliability.
Important Safety Notice
Always disconnect power before making any wiring changes. Double-check all connections before powering up your car. Use appropriate tools and follow proper safety procedures.
Connecting Motors to L298N Driver
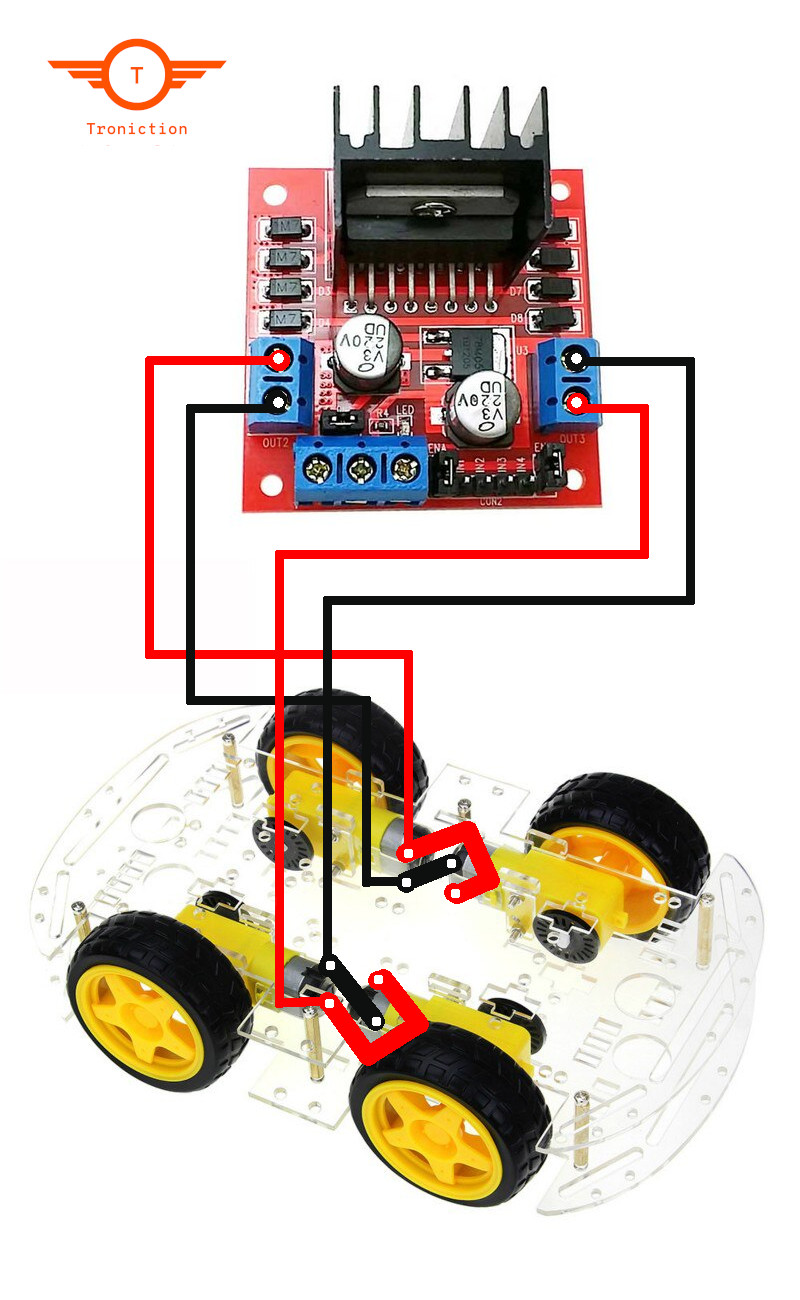
Learn how to properly connect the DC motors to the L298N motor driver module.
Connection Guide
| From | To |
|---|---|
| Left Motor (+) | OUT1 |
| Left Motor (-) | OUT2 |
| Right Motor (+) | OUT3 |
| Right Motor (-) | OUT4 |
Tips
- Match wire colors for easier identification
- Ensure secure connections
- Test motor rotation direction
Warnings
- Incorrect wiring may cause motors to rotate in wrong direction
- Double-check polarity before powering up
L298N to Arduino Connection
Connect the motor driver to Arduino for precise motor control.
Connection Guide
| From | To |
|---|---|
| Arduino Pin 8 | EnB |
| Arduino Pin 9 | IN4 |
| Arduino Pin 10 | IN3 |
| Arduino Pin 11 | IN2 |
| Arduino Pin 12 | IN1 |
| Arduino Pin 13 | EnA |
Tips
- Use male-to-female jumper wires
- Keep wires organized and labeled
- Follow the pin mapping carefully
Bluetooth Module Setup
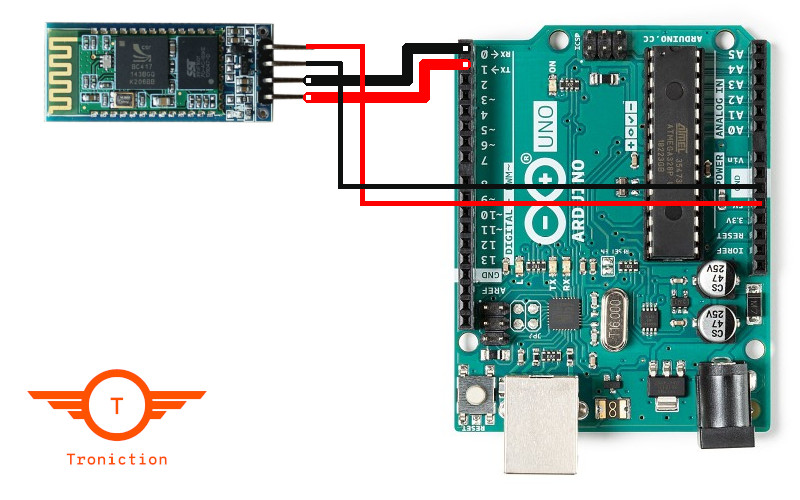
Wire the HC-06 Bluetooth module to enable wireless control.
Connection Guide
| From | To |
|---|---|
| HC-06 VCC | 5V |
| HC-06 GND | GND |
| HC-06 TXD | RX (Pin 0) |
| HC-06 RXD | TX (Pin 1) |
Tips
- Cross-connect RX and TX pins
- Power module with 3.3V or 5V
- Use voltage divider if needed
Warnings
- Never connect RX/TX directly if voltage levels differ
- Ensure proper power supply voltage
Power Supply Integration
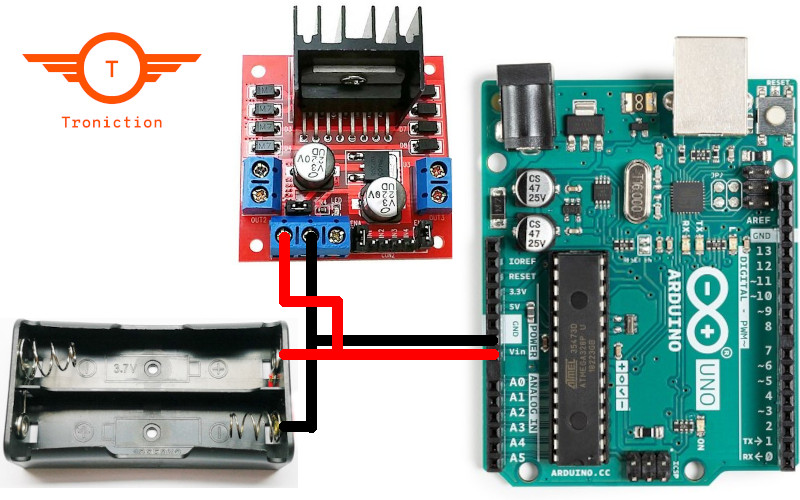
Connect the battery pack to power your Arduino car safely.
Tips
- Use appropriate gauge wires
- Add power switch for convenience
- Include reverse polarity protection
Warnings
- Check voltage levels before connecting
- Never exceed maximum voltage ratings
- Ensure proper heat dissipation
Next Steps
Now that your components are properly wired, it's time to program your Arduino car. Continue to the next chapter to learn about writing and uploading the control code.