
Build a Car With Your Kid · Chapters 2 and 3
The role card: who does what
Your child is the builder; you are the checker. Keep this card on the table: the roles, the three lines worth having ready, every talk prompt in Part 1 with what a good answer sounds like, the loop for when something goes wrong, and the checklist before power.
Who does what
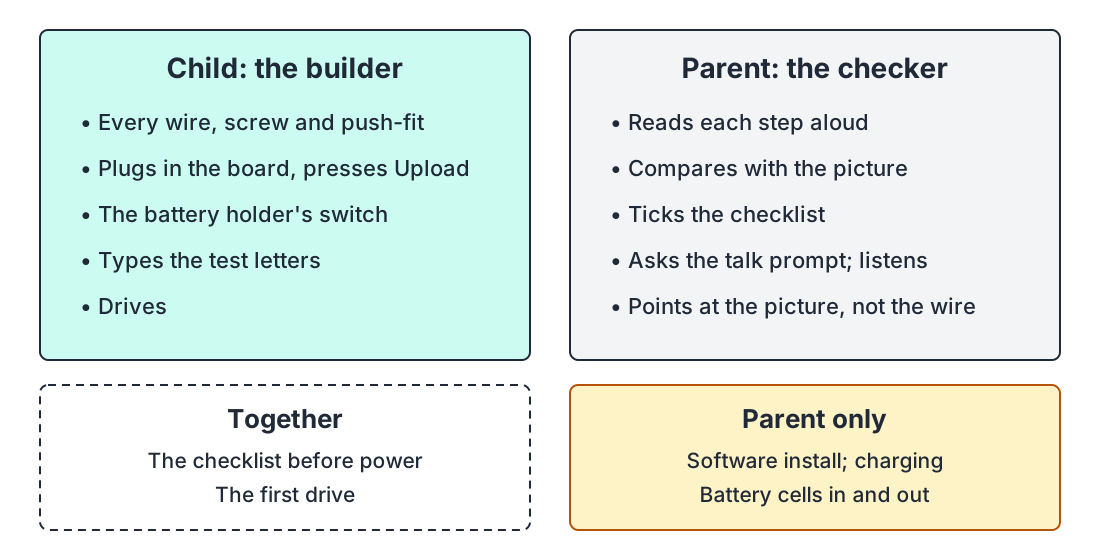
In this build, your child is the builder and you are the checker. The builder does every wire, every screw and every push-fit. The builder plugs in the board, presses Upload, flips the battery switch, types the test letters and drives. The checker reads each step aloud, compares the result with the picture, ticks the checklist and asks the questions in the "Talk about it" boxes.
Some jobs are done together. The checklist before the power goes on is one: one of you reads each line and the other checks it on the car. The first drive is the other.
And a few jobs are yours alone: installing the software on the laptop, putting the battery cells in and taking them out, and charging them. That isn't because a 12-year-old couldn't. It's because those are the steps where a mistake costs money or needs a grown-up's judgment.
Every step in this book is marked with who does it: Child, Parent, or Together. The figure shows the split.
When a wire is wrong
Point at the picture, not at the wire. If your child puts a wire in the wrong hole, don't reach over and move it. Point at the figure in the book and ask which hole the picture shows. The child finds the mistake and fixes it. That moment, when they spot it themselves, is worth more than the minute it costs.
Three lines are worth having ready:
- "I don't know either. Let's check the picture."
- "Show me which pin the picture says."
- "What do you think will happen when you press F?"
The last one matters most. Before each test, the book asks you both to guess what will happen. Write the guess down. A wrong guess that you then check is how both of you learn how the car works.
Every talk prompt in Part 1
Ask the question at the point the book shows it. The Listen for line tells you what a good answer sounds like, so you can judge it without knowing the electronics yourself. Any honest guess is a good start.
Chapter 3 · When something doesn't work: the loop
Talk about it
"Which box decides what to do? Which one does the pushing?"
Listen for: the board decides; the motor driver pushes, and the motors turn. Naming any box is a good start.
Chapter 4 · The battery, the cells and the buzzer
Talk about it
"Point to the module's two letter pins. Which one talks, and which one listens?"
Listen for: TXD talks and RXD listens. Pointing to the right two pins is enough; the names come back in Stage C.
Chapter 6 · The Stage A test
Talk about it
"The screen says
Car ready. Which box have we just proved works?"Listen for: the board, and the laptop talking to it. Not the wheels yet: nothing else is connected.
Chapter 9 · The checklist before power
Talk about it
Before the cells go in: "Point to the wire that will carry the most power. Why that one?"
Listen for: a battery lead, the red or the black one at the holder. "Because it feeds everything" is right.
Chapter 9 · The wheels test
Talk about it
"Which way will the left wheels turn when we type F? And the right wheels? Tick both guesses on the checklist."
Listen for: any guess is fine. What matters is checking it. If any wheels go the wrong way, the test box says which wires to swap.
Chapter 9 · The wheels test
Talk about it
After the speeds: "Speed 1 crawls and 9 runs. What is the pin doing differently?"
Listen for: "it's on for less of the time" or "it gives less push". A guess is fine. Part 2 has the answer.
Chapter 10 · Connected isn't the end
Talk about it
"The light went steady. Does that mean the car will move? How could we check?"
Listen for: "not yet", or "we'd have to press a button and watch". Stage D checks it.
Chapter 11 · The round-trip test
Talk about it
"The letter came back. Which boxes do we know work now?"
Listen for: all four: the phone, the Bluetooth module, the board and the wheels.
Chapter 11 · The first drive
Talk about it
"It drifts a little to one side on the floor. Is something wired wrong?"
Listen for: "probably not". No two motors are exactly the same, so one side runs a bit faster. If it spins on the spot when you press F, that's different, and the wheels test in Stage B would have caught it.
Chapter 13 · Where to go from here
Talk about it
"Which part of the car would you change first, and which of the four boxes does it belong to?"
Listen for: any part, as long as it comes with a box. There's no wrong answer here, and no answer at the back.
When something doesn't work: the loop
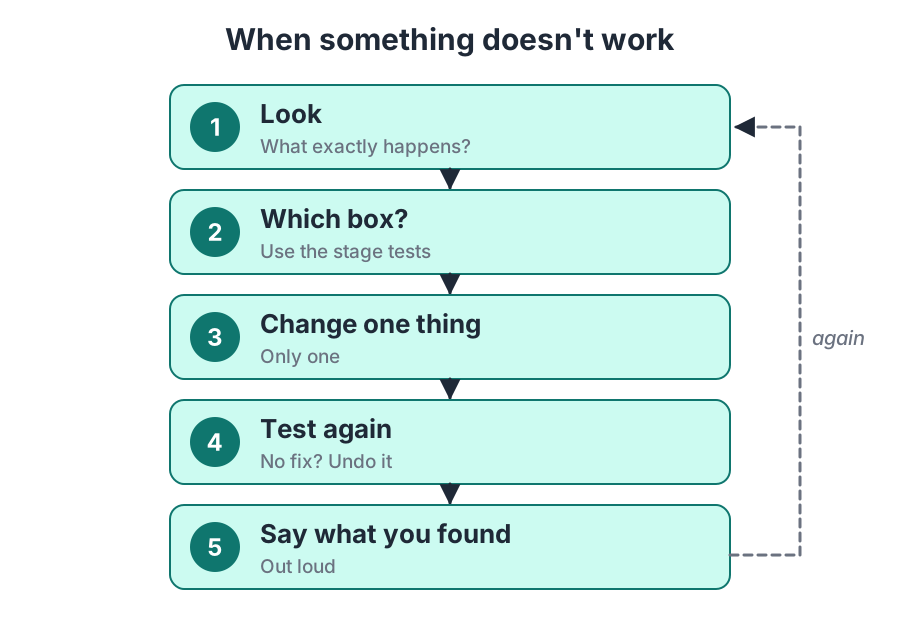
When something goes wrong, and something will, use this loop. It's five short lines. Say them out loud.
- Look. What exactly happens? Not "it doesn't work", but "the left wheels turn and the right ones don't."
- Which box? Use the stage tests to find out which box the problem lives in.
- Change one thing. Only one.
- Test again. If that didn't fix it, undo the change.
- Say what you found. Out loud, to each other.
The 10-minute rule
If you've both been stuck on the same thing for 10 minutes, stop. Don't keep trying random changes. Instead, run the debugging loop from Chapter 3: look at exactly what happens, decide which part of the car it belongs to, change one thing, and test again. If that doesn't find it, turn to Chapter 12, "If it doesn't move", or scan the code at that stage for the short video and the test page.
The checklist before power
One of you reads each line aloud; the other checks it on the car and says “yes”.
Where to stop
You don't have to build the car in one go. There are five good places to stop, and each one comes right after a test that passed:
- After the Stage A test, when the screen says
Car ready. - After the horn test in the middle of Stage B, when the horn sounds from the laptop.
- After the wheels test at the end of Stage B, when all four wheels go the right way.
- After test C1, when the Bluetooth module's light is blinking.
- After the first drive.
Stopping anywhere else means starting the next session halfway through a step. Stopping after a test means you start the next session knowing that everything so far works.