
Build a Car With Your Kid · Chapter 9
Stage B3: the battery wires, steps B36 to B45
The video
The video of the battery steps isn’t filmed yet. It’s on its way, and it will go on this page: the QR in your book stays the same.
Until then, here are steps B36 to B45 as Chapter 9 prints them. The cells stay out and the switch stays off through all of them; the checklist before power comes next, in the chapter and on the wheels test page.
Steps B36 to B45: the battery wires
Warning
The battery cells stay out, and the switch stays off, through all of these steps.
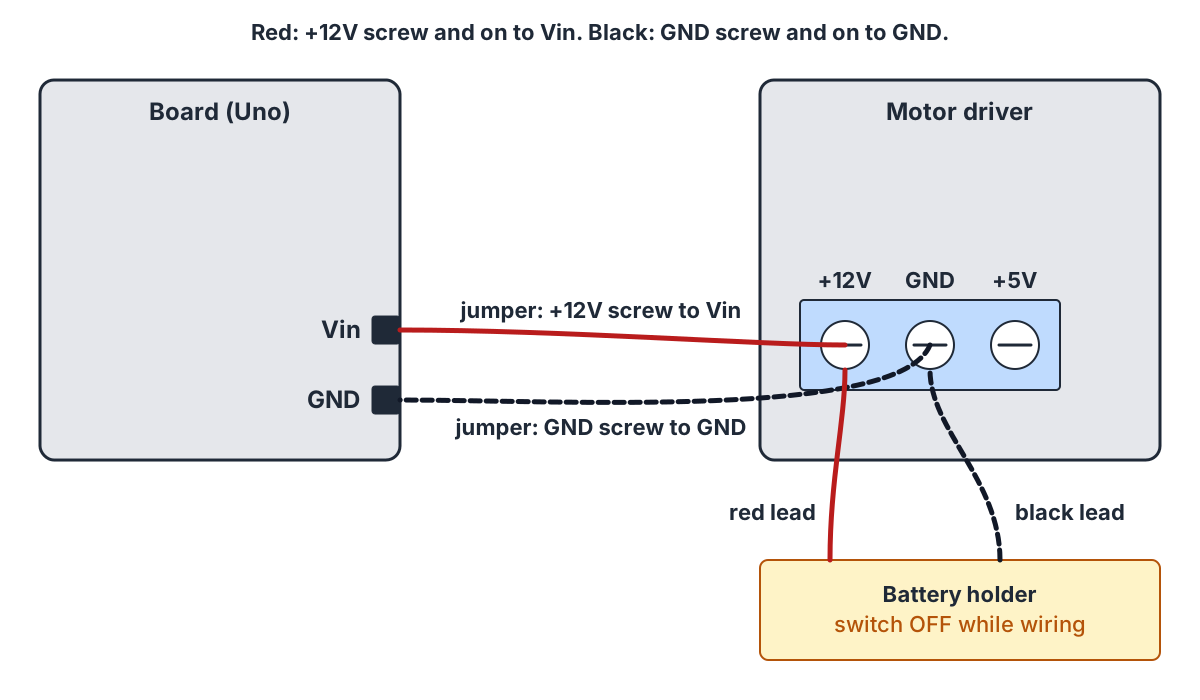
Check that the battery holder's switch is off.
Loosen the motor driver's +12V screw a few turns.
Push the holder's red lead and one end of a male-to-male jumper into it, side by side.
Tighten the +12V screw.
Push the other end of that jumper into the board's Vin pin.
Loosen the motor driver's GND screw.
Push the holder's black lead and one end of a second male-to-male jumper into it.
Tighten the GND screw.
Push the other end of that jumper into the board's free GND pin, next to Vin.
Check: red lead and a jumper in +12V, the jumper on to Vin; black lead and a jumper in GND, the jumper on to GND. Then the child tugs each of the four ends gently. None should come out.
Where to go from here
Next: the checklist before power, then the wheels test →18650 cells: real capacities and the safety rules →Why the board needs the battery too: what a brown-out is →If the car doesn’t move: every symptom, its stage and its fix →The free book: Build a Car With Your Kid →