
Build a Car With Your Kid · Chapter 6
Stage A test: Car ready
Stage A proves one box: the board, and the laptop talking to it. The proof is the words Car ready in the Serial Monitor. Tick the steps as you go; tap any “Instead” that matches what you see.
Note
This stage. The child plugs the bare board into the laptop and presses Upload, and the board answers Car ready. That proves the first box, the board, and the laptop talking to it. Nothing else is connected yet. It's the shortest stage, and the end of its test is the first good place to stop.
For the parent: install and set up
You need the Arduino IDE, the free app that puts sketches onto the board. Do these steps before session 1, then unplug the board so your child can plug it in.
There's a short video of these steps at troniction.com/go/car-a.
Download the Arduino IDE from arduino.cc/en/software and install it. This book was written with version 2.3. A newer 2.x version works the same way.
Plug the board into the laptop with its USB cable. The board's ON light comes on.
Open the Arduino IDE. In the Tools menu, choose Board, then Arduino AVR Boards, then Arduino Uno. If the IDE offers to install "Arduino AVR Boards", say yes.
In Tools → Port, choose the board. To be sure which one it is, unplug the board, look at the list, plug it back in, and pick the one that appeared.
Test
You should see: a port appears when you plug the board in.
Instead: no new port appears, even though the ON light is lit.
Meaning: the laptop can't talk to the board. Either the cable only charges (some USB cables have no data wires inside), or the board is a clone that needs a driver.
Fix: try another USB cable first, one you know carries data. If that doesn't help and your board has a chip marked CH340 near the USB socket, install the CH340 driver from the chip maker, WCH. The link is on the Stage A test page, troniction.com/go/car-test-a.
Unzip the sketch you downloaded from troniction.com/go/car-sketch. Keep the folder called car with both files inside it, car.ino and pitches.h.
In the IDE, choose File → Open and open car.ino. The sketch opens in a window.
Unplug the board. Leave the IDE open with the sketch in it.
For the child: put the sketch on the board
Session 1 starts here, with the child. You'll plug in the board, press Upload, and wait for the board to say it's ready. The steps are A1 to A5.
Plug the USB cable into the board and into the laptop. Look for the ON light.
Read the name at the top of the IDE window, beside the board picker. It should say Arduino Uno. If it doesn't, choose it again (step P3 and P4).
Click Upload: the round button with an arrow pointing right, at the top left. Then wait. Don't unplug anything.
Watch the message area at the bottom of the window. When the upload has worked, it says Done uploading. While it uploads, the lights on the board flicker. That's normal.
Test
You should see: "Done uploading".
Instead: an error in orange or red text, such as "not in sync" or "port busy".
Meaning: the IDE couldn't reach the board.
Fix: check that Tools → Board says Arduino Uno and Tools → Port is the board's port. Close any other program that might be using the board. Unplug the cable, plug it back in, and press Upload again.
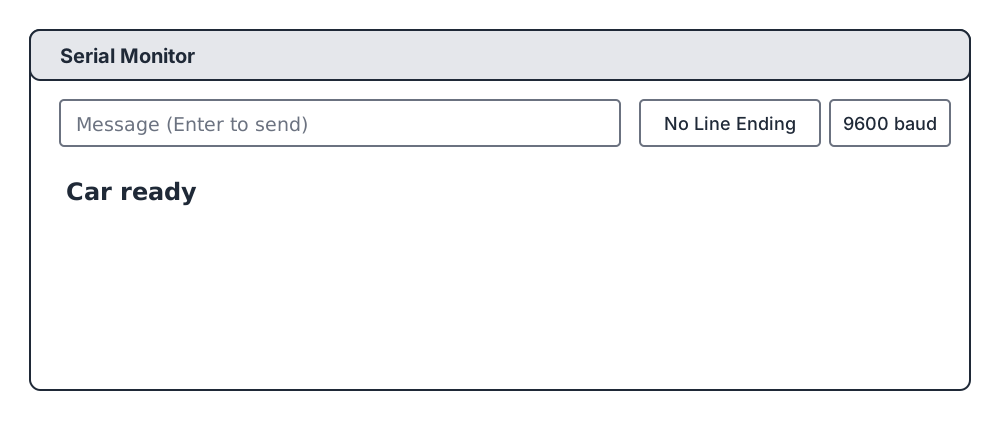
Open the Serial Monitor: the magnifying-glass button at the top right of the window. A panel opens at the bottom. In its menu of speeds, choose 9600 baud.
The Stage A test
The proof is the words Car ready in the Serial Monitor. The L light coming on and staying on is a second sign, but on its own it proves nothing.
Opening the Serial Monitor usually restarts the board, so Car ready appears even if you opened it a while after the upload. If it isn't there, press the board's RESET button. When the board restarts, the L light flickers quickly a few times. That's the board starting up. Then it comes on and stays on.
Test
You should see: Car ready in the Serial Monitor. (The L light also comes on and stays on.)
Instead: the L light blinks slowly, on and off, forever, and the Serial Monitor is empty.
Meaning: the board is still running the sample sketch it came with. The upload didn't happen.
Fix: press Upload again and wait for "Done uploading".
Instead: strange symbols in the Serial Monitor instead of words.
Meaning: the Serial Monitor's speed isn't 9600.
Fix: choose 9600 baud. Then press the small button on the board marked RESET. It restarts the board, and Car ready prints again.
Instead: the L light is on, but the Serial Monitor is empty.
Meaning: nothing is proved yet. Car ready is the only proof that this sketch is on the board. The L light can be on for other reasons.
Fix: check the speed is 9600, then press RESET on the board. If Car ready still doesn't appear, press Upload again (A3) and wait for "Done uploading".
Talk about it
"The screen says Car ready. Which box have we just proved works?"
Listen for: the board, and the laptop talking to it. Not the wheels yet: nothing else is connected.
This is a stopping point. Unplug the USB cable. The sketch stays on the board, so next time the board starts with it already there.
The CH340 driver
Only if no port appears when you plug the board in, another USB cable didn’t help, and the board has a chip marked CH340 near the USB socket. The driver comes from the chip’s maker, WCH:
- Windows: CH341SER.EXE (WCH’s download page)
- macOS: CH34XSER_MAC.ZIP (WCH’s download page)
The parent installs it, then unplugs the board, plugs it back in and looks again for the new port in Tools → Port. On a laptop you aren’t allowed to install software on, use another laptop (Chapter 1).
Still stuck
Stop changing things. Run the loop from Chapter 3, out loud: look, which box, change one thing, test again, say what you found. Then go through the full table of symptoms, which starts from the first stage test that fails.
Still stuck after that? Write to [email protected] with the stage test that fails and exactly what you see. If the book turns out to be wrong, it gets a dated correction.
If the car doesn’t move: every symptom, its stage and its fix →The role card and the loop, to print →The stage tests: Stage A · Stage B · Stage C · Stage D